Hello friends, today I am going to tell you how to build a homemade mobile chicken coop.
I have found the information on the page hogarmania:
https://www.hogarmania.com/bricolaje/tareas/carpinteria/construir-gallinero-movil-15999.html
As it is written in Spanish, I am going to translate it into English, I hope it can be useful to you!
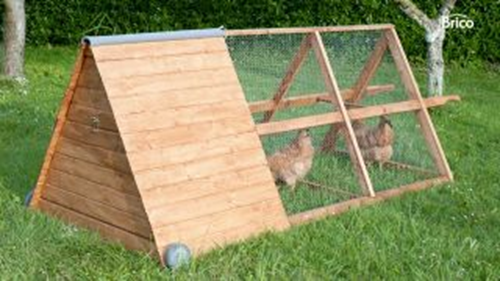
It is a simple job with which we will be able to make a homemade and cheap wooden chicken coop, in addition, we are going to put wheels on it to be able to move it easily. In this way we can have our own hens and enjoy their eggs.
More and more families are trying to lead a more ecological and sustainable life.
In addition, in society we also find new values that are already deeply rooted regarding returning to natural food and a way of life more related to nature.
For this reason, having a homemade chicken coop at home can be very practical to enjoy fresh, quality eggs.
Not all homes can have a homemade chicken coop since chickens need their space to live. But if we have a large garden, we can have our own chickens, and thanks to the tutorial that I am going to show you, we can make them a homemade wooden chicken coop.
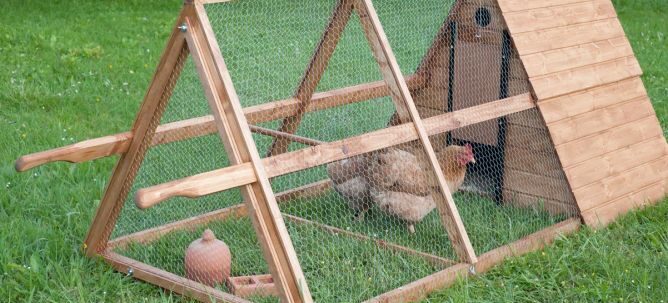
On this occasion, the work that I am going to teach you to do is aimed at making it a space so that the hens can, above all, spend the night well protected. Also, so that they have an area where they can have the eggs and that we can access them easily and without disturbing them much.
This homemade chicken coop is designed to have 2-3 chickens at most, since the idea is to have it in a small garden.
In case of having a large garden, the possibilities to have a homemade chicken coop are extended and a fenced area can be made with a wooden shed as a chicken coop.
Ideally, the hens can move freely around the garden to eat and spend the day, and at specific times when we want to protect them, they have this space where they can be inside the house or even outside (despite be a small space).
Taking care of the hens properly, we will get them to lay eggs almost every day. The reason for making a mobile chicken coop is that it takes up much less space than a fixed one and will allow us to raise two or three hens without problems.
To make the structure we will use pine strips of different sizes, slats of the same material and okoume plywood. We will join the different pieces together with lag screws and to place the frieze we will use nails. The rest of the chicken coop will be covered with a wire mesh that will be stapled to the slats.
Tools:
-keyhole saw
-Blade for wood
-Blade for curved cuts in wood
-Sander
-Grinder
-Drill Drivers
-3mm wood drill bit with
-Countersink
-8mm multi-material drill
-5mm multi-material drill
-Hammer
-Tongs
-Bucket
-Electric stapler
Materials:
-30 X 30 mm pine strip
-45 X 20 mm pine strip
-30 X 10 mm pine strip
-16mm okume plywood
-20 X 20mm Aluminum U Profile
-4 X 40 mm lag screws
-4 X 70 mm lag screws
-4 X 16 mm lag screws
-latch
-piano hinge
-wire net
– 2 Wheels
-Cord
-8 X 50 mm wing nuts
-Lost head tips
-Socket
-Staples
-Insulating tube
-Outdoor varnish
Step 1
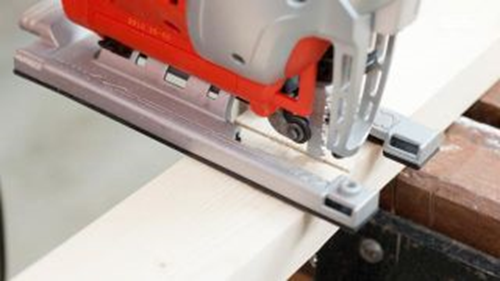
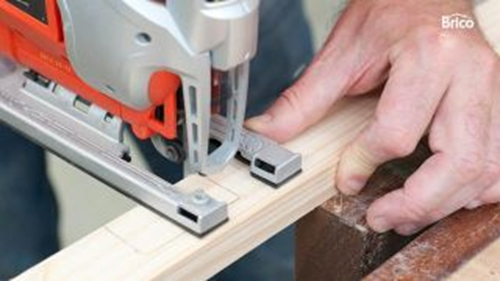
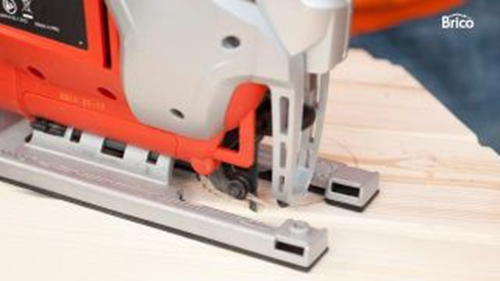
To build a chicken coop, first of all, we mark and cut all the pieces of wood that will make up the structure, using the jigsaw and a wood blade.
Step 2
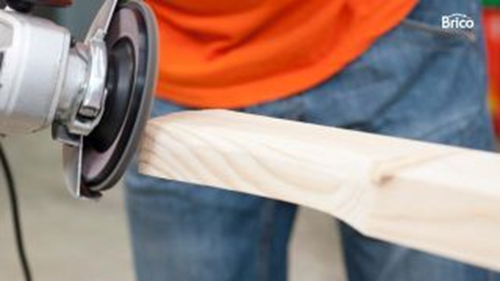
We draw the shape we want to give the handles at one end of the side crossbars and make the cuts. Next, we finish the job by going over the surface with a grinder fitted with a disc for deburring wood.
Step 3
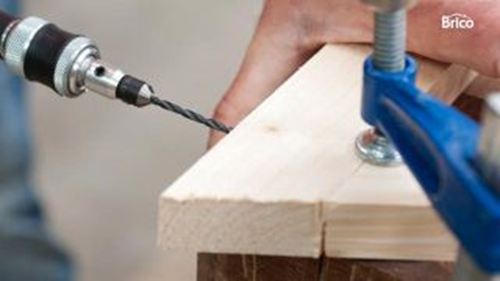
The next step is to assemble the triangles. We present the slats on the table, we hold them with clamps and we make some guide holes. Afterwards, we replace the drill bit with a suitable tip and screw the pieces together.
Step 4
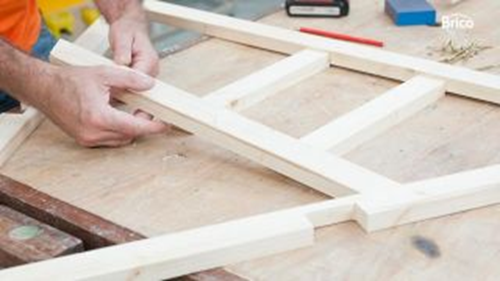
In the intermediate triangles we will have to make some boxes to be able to support them on the base slats. We must also make some side boxes in the four triangles that make up the frame, to house the two side crossbars.
Step 5
We cut off the top points of the triangles, sand them smooth and add the slats we need to mount one of the doors.
Step 6
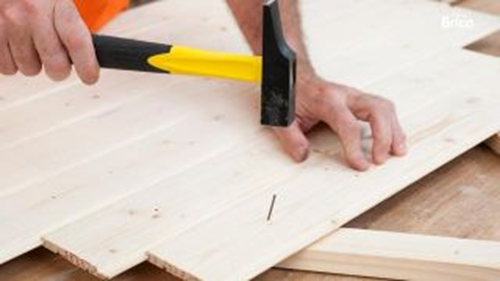
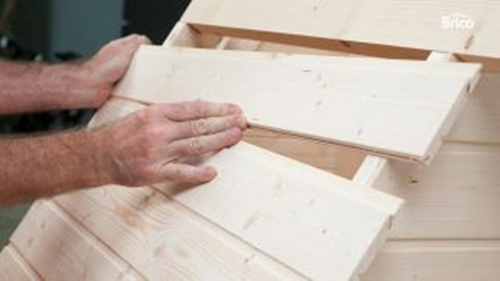
We cover one of the faces with some pine wood slats, tongue and groove between them and fixing them to the triangle with lost head tips.
Step 7 Once we have covered the entire structure, on one of the sides, we cut the excess with the jigsaw and a wood blade.
Step 8
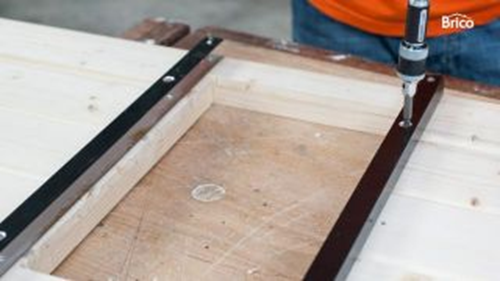
The next thing we will make is a rectangular hole in the triangle that we have just covered with slats, which will be where we will place the door. Next, we fix the aluminum profiles with lag screws.
Step 9
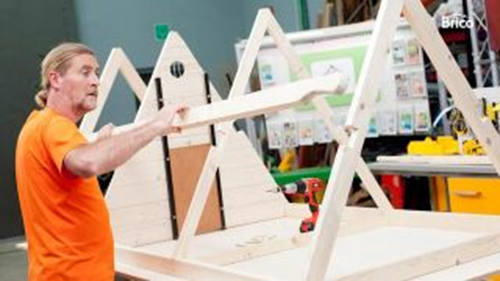
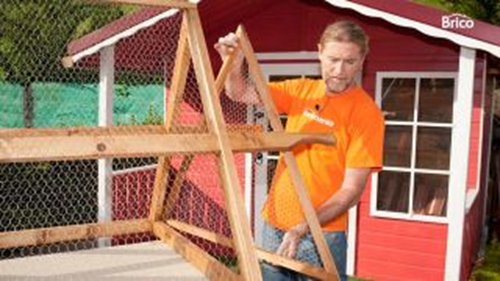
Now we can start assembling the chicken coop. We put the two thicker triangles on both ends of the base slats and screw them together.
Step 10 Then, we fit the two intermediate triangles and fix them also with lag screws. We insert the door into the rails and after screwing the two side slats, we fix the upper crossbar.
Step 11
Next, we fasten the board that will be the base of the structure with lag screws. In addition, we will screw a dividing piece in the noble area of the chicken coop, so that each hen has its own bedroom.
Step 12
We cover the rear door of the chicken coop with the frieze and cut off the excess. Next, we completely closed the chicken house, also covering the sides with pine slats.
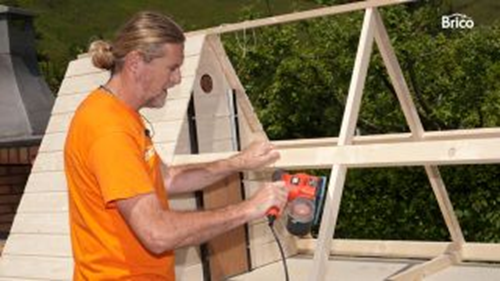
Step 13 Now, we go over the entire chicken coop with the sander provided with a sheet of fine-grain sandpaper, until the surface is completely smooth. Then, we remove the dust that has been produced with a rag.
Step 14
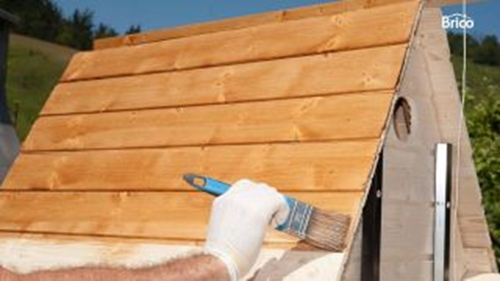
Now we give the wooden structure two coats of a tint varnish, suitable for exteriors, always following the direction of the grain.
Step 15
Once it has dried, we cover the chicken coop with a wire net that will be attached to the structure with staples.

Step 16
We nail the finishing slats and incorporate the emergency door, made with slats and wire net and we will fasten it to the frame with some brackets.
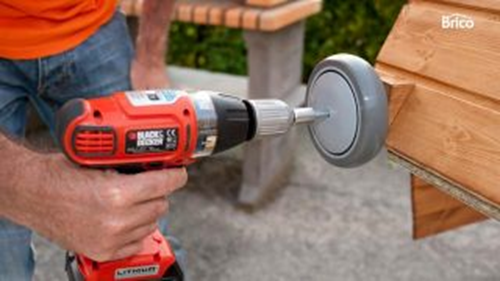
Step 17 We placed some wedges on the sides of the shed as a base for the wheels. Next, we fix the wheels using the drill and a socket wrench.
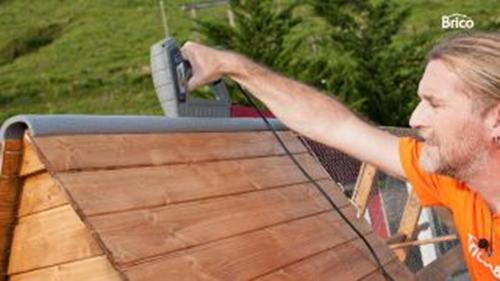
Step 18
To guarantee the sealing of the roof, we will cover the joint with an insulating plumbing tube. We cut the piece to size, open it and fix it with staples.
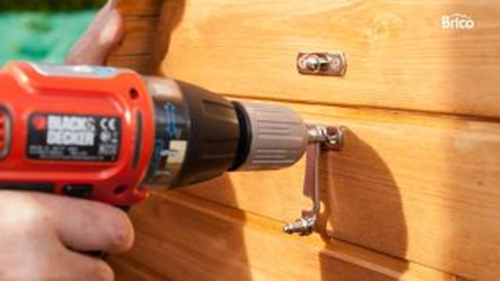
Step 19
We finish the job by screwing a latch on the door through which we will access the interior of the noble area of the hens to collect the eggs.
Job done!